Building Your First Gaming PC: Components Explained
A beginner's guide to PC parts - CPU, GPU, RAM, storage, motherboard, PSU, case, and cooling - and how to pick them for a balanced gaming build.
Planning Your Build — Before buying parts, define your budget, performance goals, and upgrade path. Consider the games you play, your target resolution and refresh rate, and whether you also plan on streaming or content creation, which can change component priorities. Choose a form factor that suits your space and style: full towers allow easier building and better airflow, while compact cases demand careful cable management and low-profile parts. Plan for compatibility using vendor specs: check CPU socket, memory type, GPU length, cooler height, and drive bays. Think about I/O needs such as USB count, Wi‑Fi or Ethernet, and audio outputs. Prepare basic tools, an anti-static strap or frequent grounding, and a large, well-lit surface. Consider peripherals too: a responsive monitor, comfortable keyboard, accurate mouse, and a headset can unlock the potential of your new rig. Finally, sketch a build order to minimize rework, and keep small boxes or bins handy for screws and accessories.
CPU and Motherboard — The CPU drives game logic and background tasks, while the GPU handles most of the rendering. For the processor, balance core count, thread count, and clock speeds based on your workload. Many games value high single-core performance, but streaming, recording, and multitasking benefit from more cores. The motherboard sets your platform's capabilities: match the socket, then look at chipset features, VRM quality for stable power delivery, and memory support for speed and capacity. Check PCIe lanes, M.2 slots, and rear I/O to support storage, capture cards, or high-speed networking. Pick a board size that fits your case and cooling plan, and ensure BIOS features like profile saving and fan control are available. Pairing the right CPU with a motherboard that supports your intended upgrades, such as faster RAM or additional NVMe drives, helps keep your build flexible and efficient over time.
Graphics Card and Display Goals — The graphics card is the heart of most gaming builds. Begin with your target resolution and refresh rate: 1080p high refresh emphasizes speed, 1440p pushes balanced fidelity, and 4K demands raw power. Evaluate VRAM capacity for modern textures and large game worlds, aiming for headroom to avoid stuttering. Consider cooler design, card length, and power connectors to ensure your case and PSU can accommodate the GPU. Match the GPU to your CPU to avoid bottlenecks, especially in competitive titles where high frame rates expose imbalances. Look for thermal performance and acoustic profiles in reviews, and remember that case airflow strongly influences GPU temperatures. If you value visual features like ray tracing or use upscaling technologies, account for their performance impact and quality modes. For multi-monitor or high-bandwidth displays, confirm the right display outputs and standards. Investing in a GPU aligned with your display goals ensures smoother gameplay and a more consistent experience.
Memory, Storage, and Cooling — For RAM, aim for a capacity that suits modern games and background tasks, commonly starting at a healthy baseline for gaming with room to grow. Prioritize dual-channel for bandwidth, and balance frequency and timings for stability and real-world gains. Enable memory profiles in the BIOS to reach rated speeds. For storage, use an NVMe SSD for the operating system and frequently played games to speed up boot and load times, and add a secondary SATA SSD or hard drive for bulk libraries. Leave headroom for patches, recordings, and creative projects. Effective cooling keeps components quiet and performing well. Choose between robust air coolers and convenient all-in-one liquid coolers based on case clearance and noise preferences. Ensure a clear airflow path with front intake and rear or top exhaust, apply thermal paste correctly, and fine-tune fan curves to balance temperatures, acoustics, and dust accumulation.
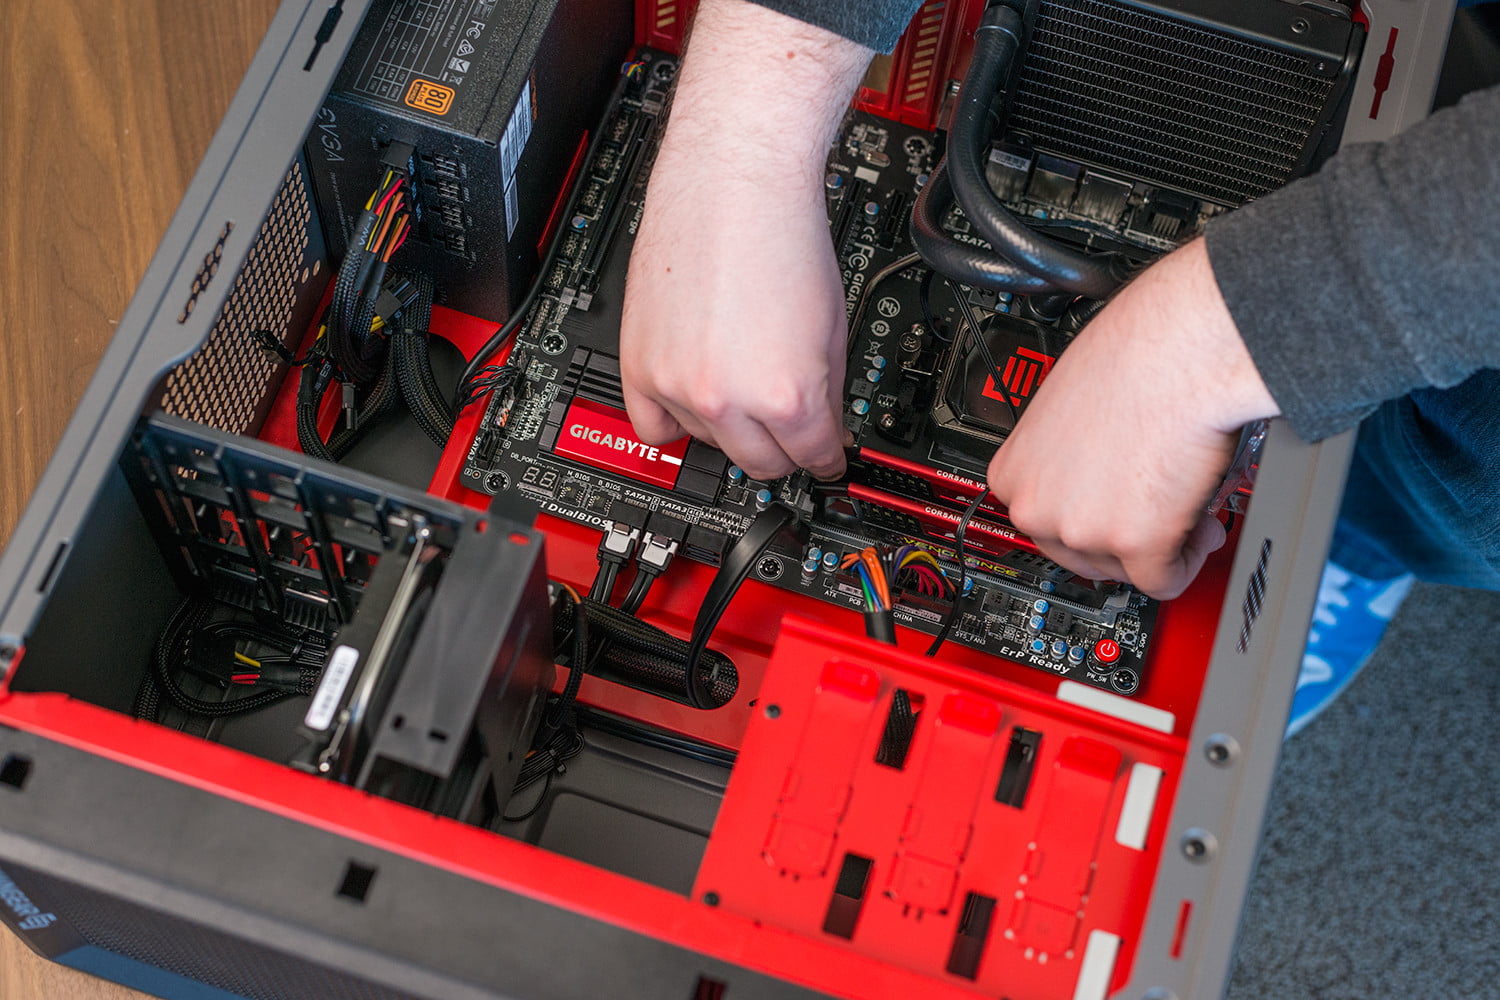
Power, Case, and Assembly Tips — A reliable power supply safeguards your build. Choose sufficient wattage headroom for spikes and future upgrades, prioritize an efficiency rating, and confirm the right connectors for your GPU and motherboard. A well-designed case simplifies building: look for smart cable routing, removable dust filters, generous clearances, and modular drive cages. During assembly, breadboard the system outside the case to test CPU, one RAM stick, and GPU for initial POST, then install components in stages. Use consistent cable management to improve airflow and ease troubleshooting. Practice ESD safety by grounding yourself and handling parts by the edges. After first boot, update BIOS, enable XMP or memory profiles, and install chipset and graphics drivers. Run a short stress test to verify thermals, then calibrate fan curves for quiet operation. Keep documentation handy, label spare screws, and note any settings changes for future maintenance and upgrades.